Install Other Region Firmware
This page uses one example: installing the global Yoga Tab Plus AI firmware onto a China Yoga Pad Pro AI (the same model sold in a different region).
The current China firmware version does not matter. It can be older or newer.
You can start once the device is connected in USB debugging mode or Bootloader mode. See Connecting a Device for help.
In the sidebar, click Flash Firmware and follow the wizard.
01 / Region
Region
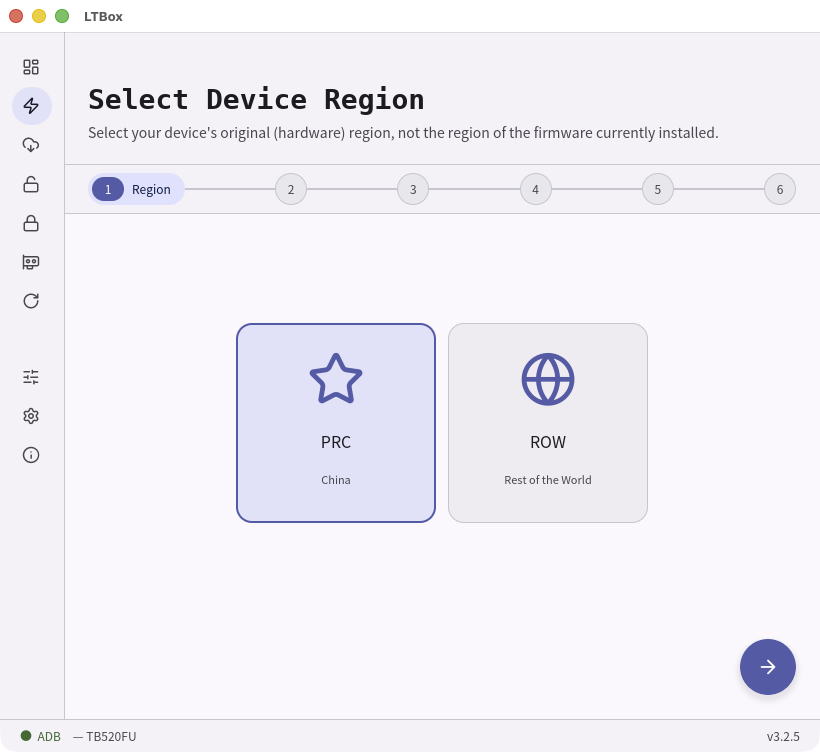
When the wizard opens, LTBox looks up the sale area registered to the device's serial number, preselects PRC or ROW from it, and goes straight to Flash Target. This screen appears only when that lookup cannot decide: there is no serial to read (the device is not connected over ADB or the bootloader), the lookup fails, or the sale area is neither China nor global. When no serial is available LTBox asks you to type one in — dismiss that prompt to choose by hand. A model sold only in China is preselected as PRC without any lookup.
Choose your device's original hardware region, no matter which firmware is currently installed. In this example it is PRC. The region can still be changed from the Confirm screen.
02 / Target
Flash Target
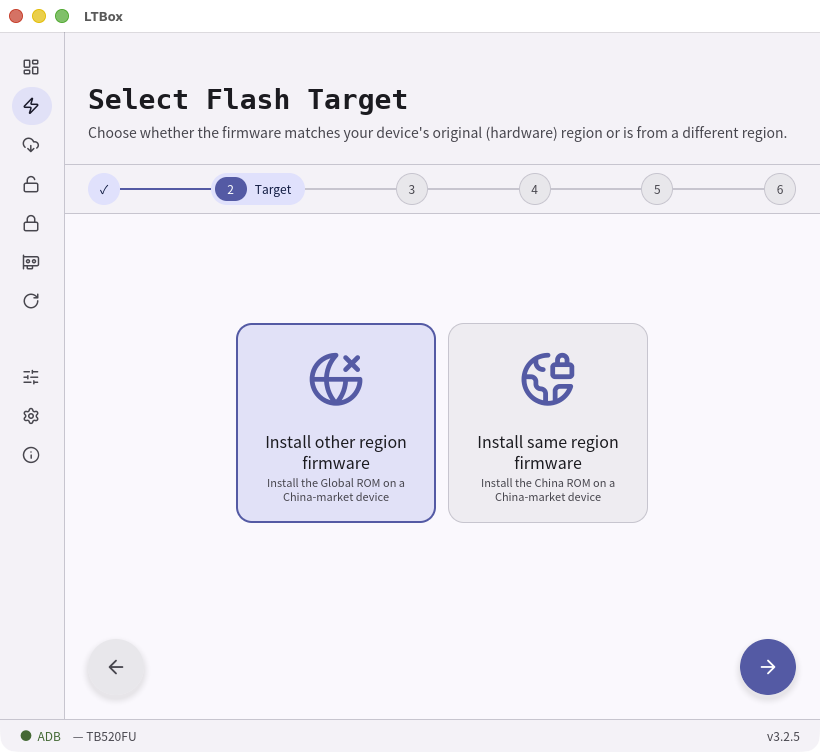
Compare the device's original region with the firmware region. In this example, the regions are different, so choose Install other region firmware.
03 / Data
Data Mode
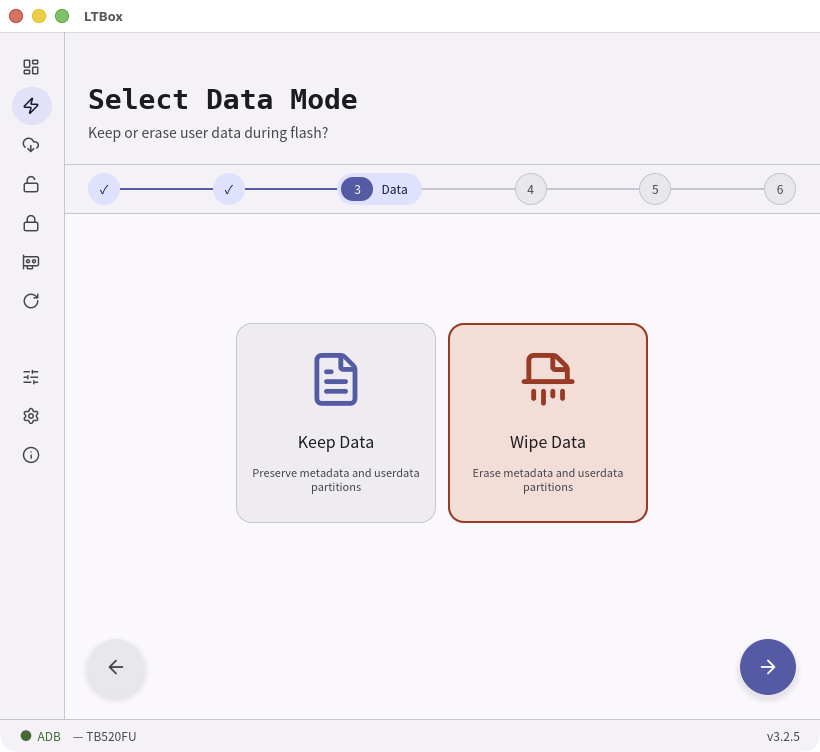
Choose whether to keep or erase user data. When the installed firmware region and the target firmware region are different, you must choose Wipe Data. (If a different-region firmware is already installed and you are only reinstalling or updating it, Keep Data is fine.)
04 / Country
Country Code
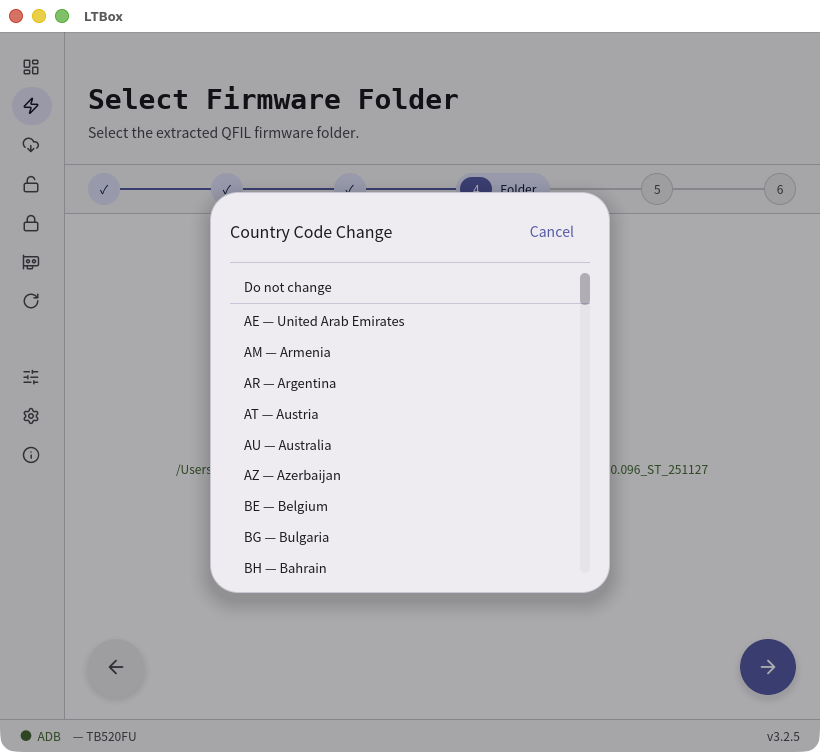
After you choose Wipe Data, LTBox opens a Country Code Change dialog over the Firmware Folder step. Usually pick the country where you live — it mainly controls which Wi-Fi channels are allowed and does not change much else. Choose Do not change to leave the current code alone. You can still adjust it later on the Confirm step.
05 / Folder
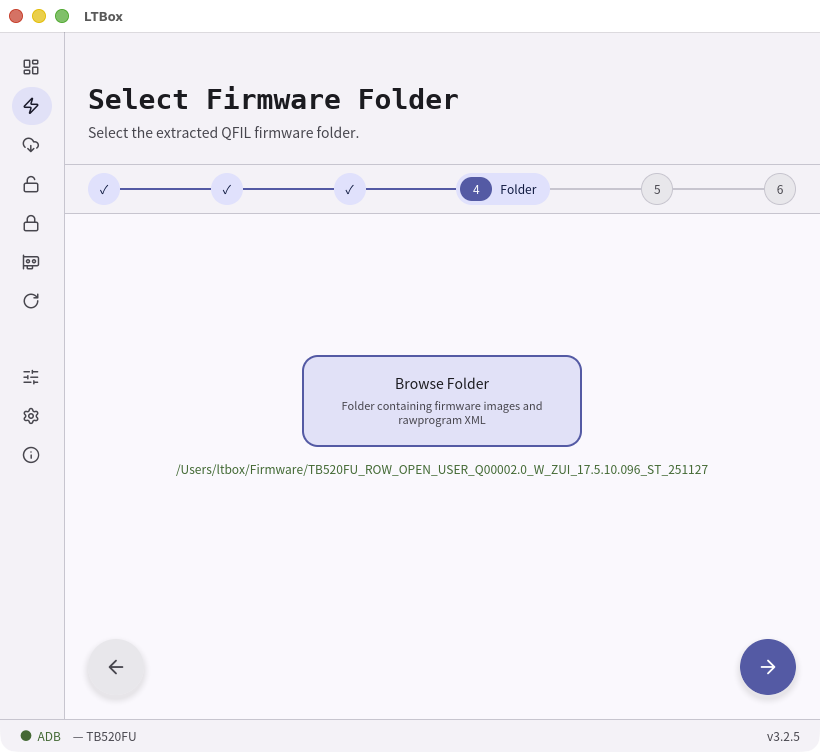
Firmware Folder
Select the folder that contains the firmware images. In this example it is the
TB520FU_ROW_OPEN_USER_Q00002.0_W_ZUI_17.5.10.096_ST_251127\image folder.
06 / Confirm
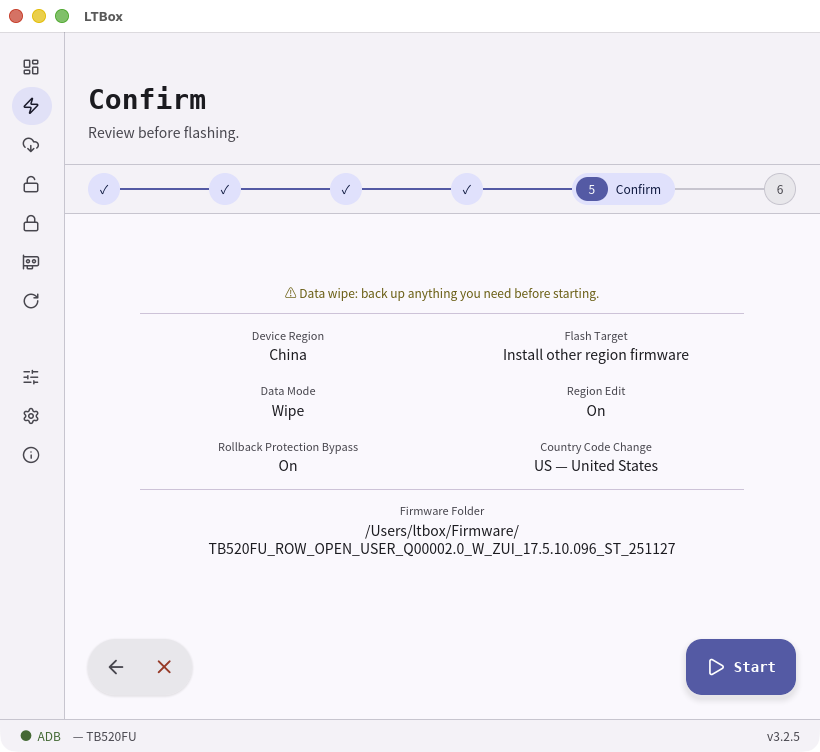
Confirm
Check the options you selected, then click Start. The task begins and the device reboots several times as needed.
07 / Flash
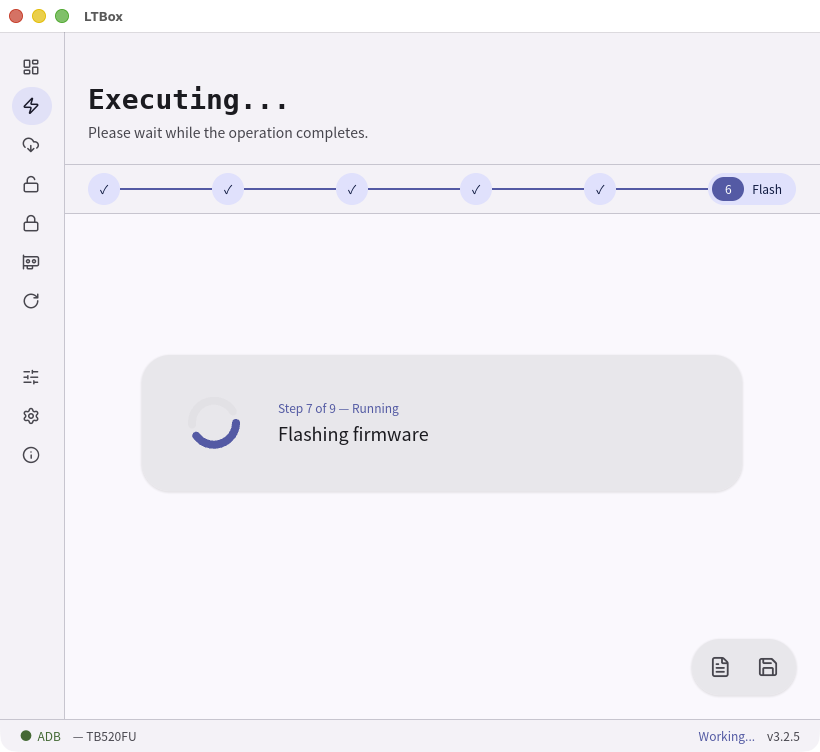
Flash
The Flash firmware partitions step takes the longest. You can click Show log to see more detailed progress.
08 / Done
Done
When it finishes, the Yoga Pad Pro AI boots with the Yoga Tab Plus AI firmware installed.