01 / Scope
When you need this
This procedure uses the GhostLock (CVE-2026-43499) vulnerability to get temporary root — a jailbreak that disappears on reboot — and replaces a wrong OCDT with it. If neither situation below applies to you, it is safer not to continue.
The OCDT was never converted after the firmware conversion, so the pen is not detected.
The OCDT was converted too, so the pen works, but the bootloader can no longer be reached.
Case B needs the original OCDT you backed up yourself earlier. Without that backup, this method cannot undo the loss of bootloader access. Using someone else's OCDT from the internet is pointless.
The GhostLock run on this page was confirmed on OxygenOS 16.0.9.400. There is no guarantee that the same vulnerability keeps working on later builds.
02 / Prepare
Get the KernelSU app and ADB ready
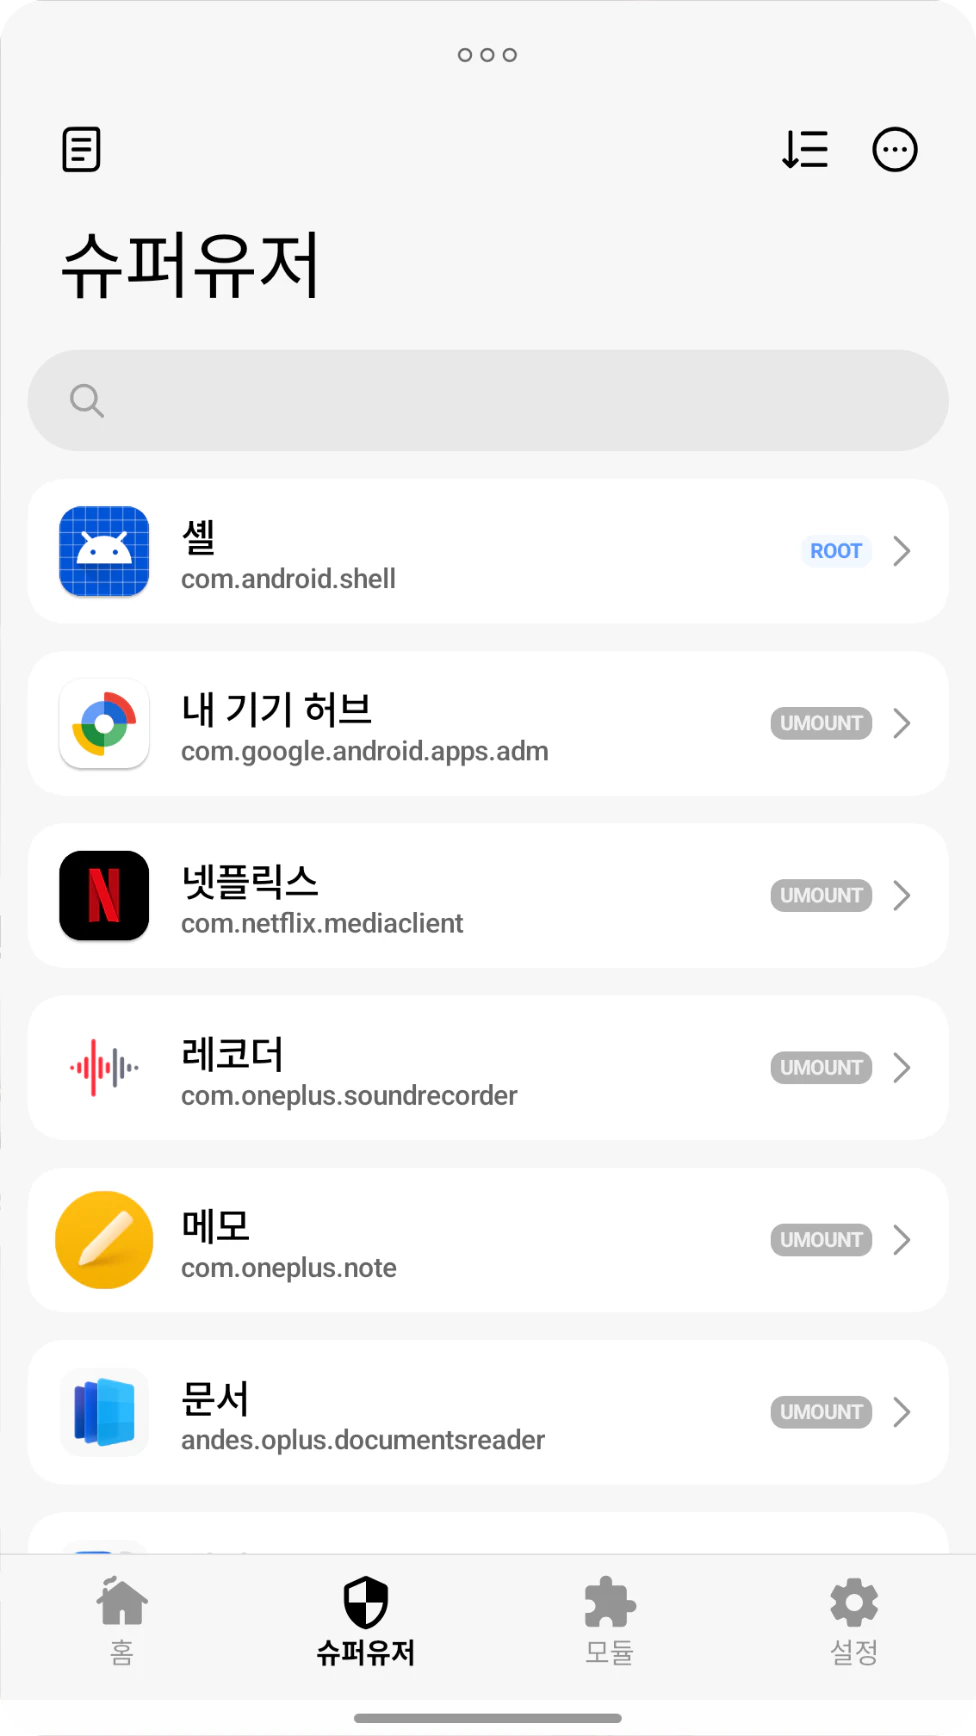
Install the KernelSU APK on the device first. If the GhostLock run stops at
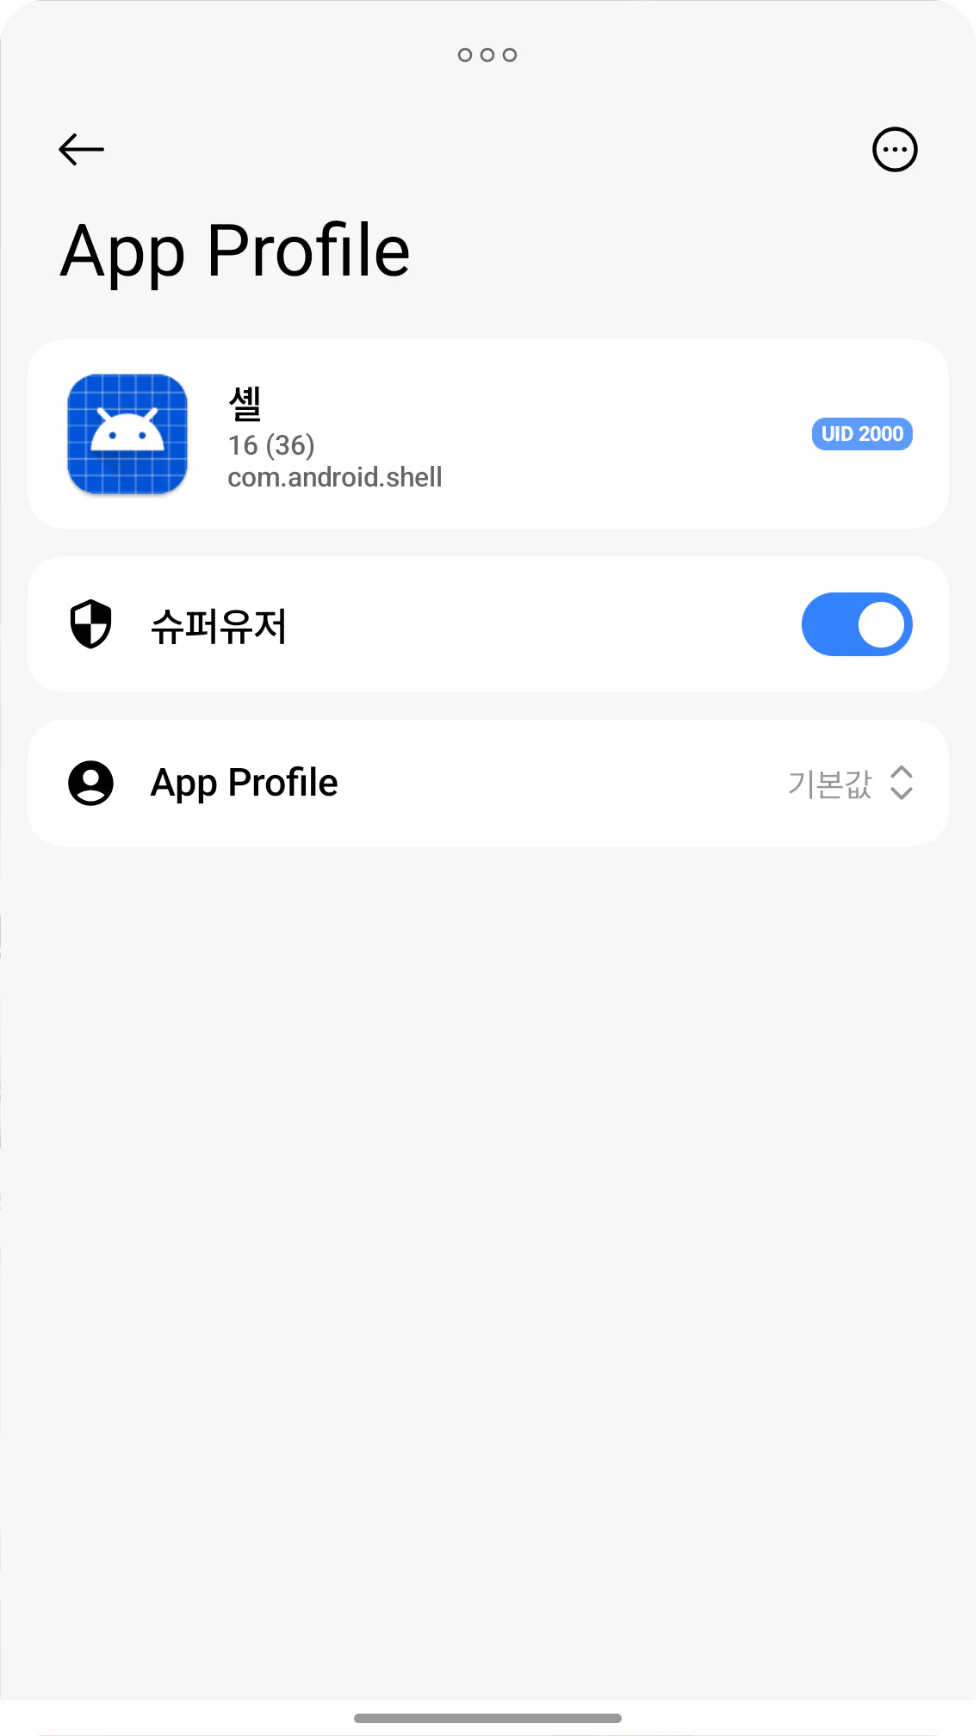
waiting for su..., you have to grant root to Shell from the KernelSU app.
Install Platform Tools on Windows
Open Windows Terminal or Command Prompt as administrator and run:
winget install --id Google.PlatformToolsWhen the install finishes, close the terminal window completely and open it again so the new PATH takes effect.
PS C:\> winget install --id Google.PlatformTools
Found Google Platform Tools [Google.PlatformTools]
Installing package...
Successfully installed
The adb and fastboot commands are now available in a new terminal window.
03 / GhostLock
Download and run the GhostLock binary
Use the GhostLock download button to get the ghostlock binary. Open a terminal in the folder
that holds the downloaded file and run these commands in order.
adb push ghostlock /data/local/tmp/a/e
adb shell chmod 755 /data/local/tmp/a/e
adb shell /data/local/tmp/a/e
If it stops at waiting for su..., open the KernelSU app and grant root to the Shell entry.
[*] kernel: 6.6.118-android15-8-g2e6b9c3812c5-ab15114928-4k
[+] offsets matched: 6.6.118-android15-8-g2e6b9c3812c5-ab15114928-4k

[+] SELinux DISABLED

[*] child uid = 0
[+] child is root!
[+] root shell pid=11604 uid=0
[*] waiting for su...
Open the KernelSU app and grant ROOT to Shell
[+] su ready, fixing SELinux policy
[+] load_policy done
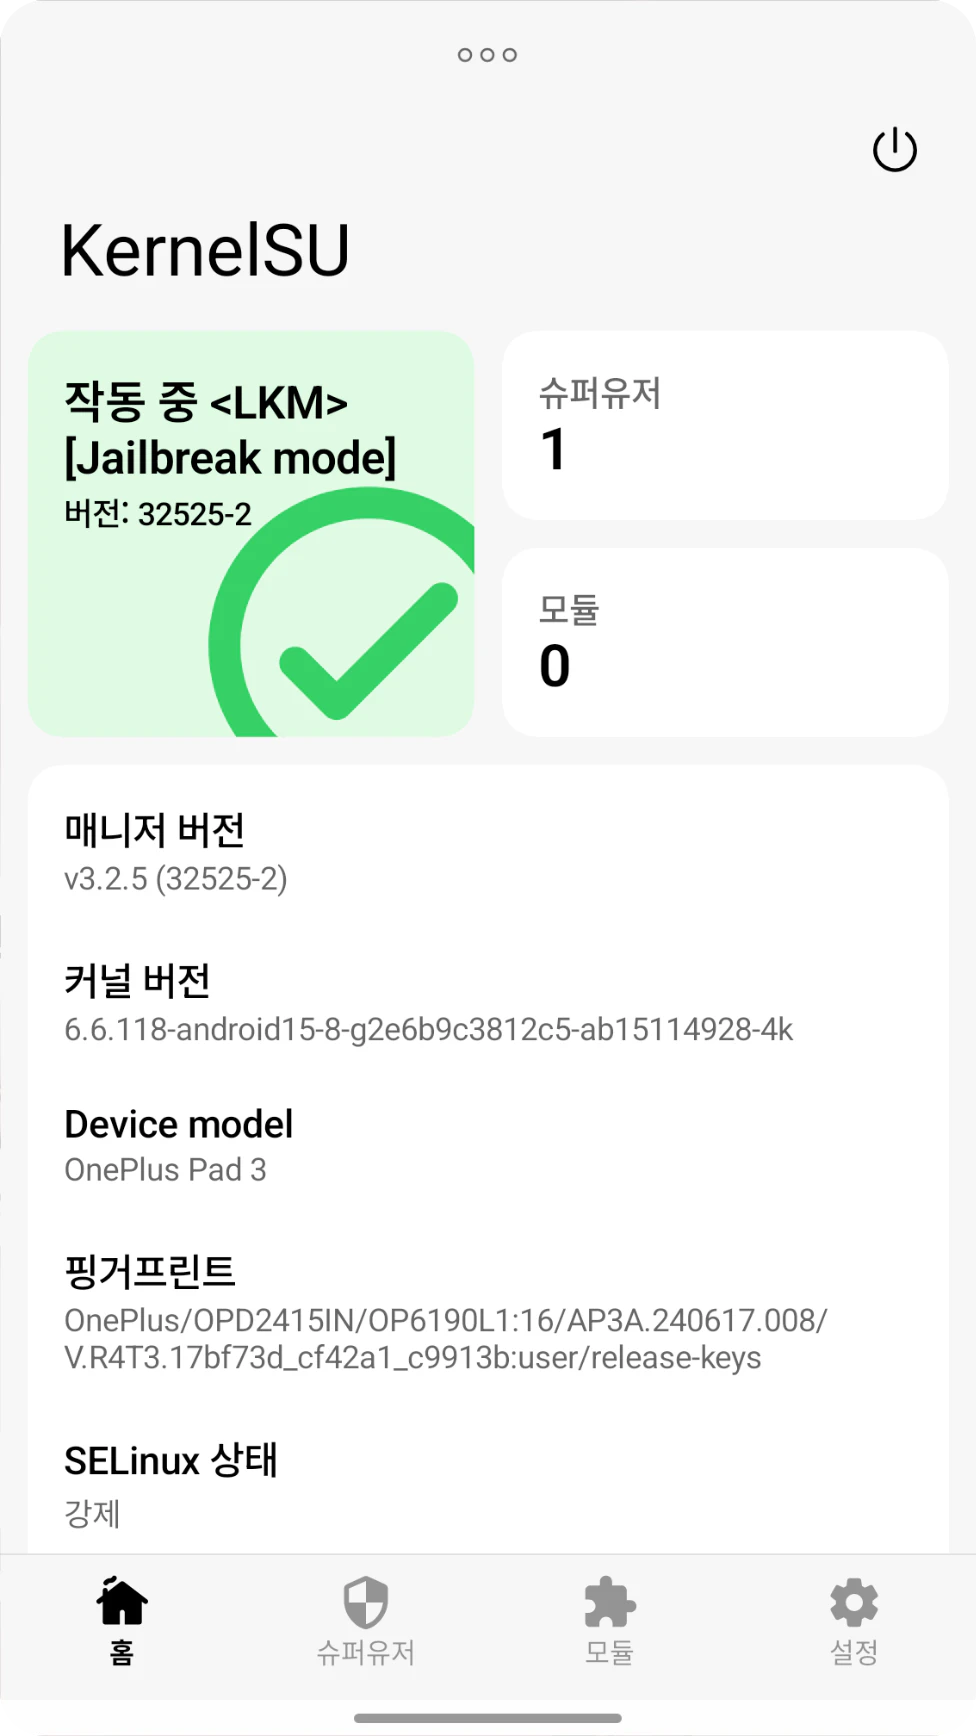
Once the key lines above show up, the GhostLock run is done.
04 / Backup
Dump the current OCDT if you need to
If you are in case A and have no OCDT backup, dump the OCDT from the device first. In case B this step cannot solve the problem — you have to use the OCDT file you backed up earlier.
adb shell su -c dd if=/dev/block/bootdevice/by-name/ocdt of=/sdcard/ocdt.img
adb pull /sdcard/ocdt.imgC:\> adb shell su -c dd if=/dev/block/bootdevice/by-name/ocdt of=/sdcard/ocdt.img
256+0 records in
256+0 records out
131072 bytes (128 K) copied, 0.006 s, 21 M/s
C:\> adb pull /sdcard/ocdt.img
/sdcard/ocdt.img: 1 file pulled, 0 skipped. 17.0 MB/s (131072 bytes in 0.007s)
C:\>
Check that ocdt.img was copied to the PC. If the file is not 128 KB, or dd
failed, do not move on to the next step.
05 / Edit
Edit the OCDT and write it back
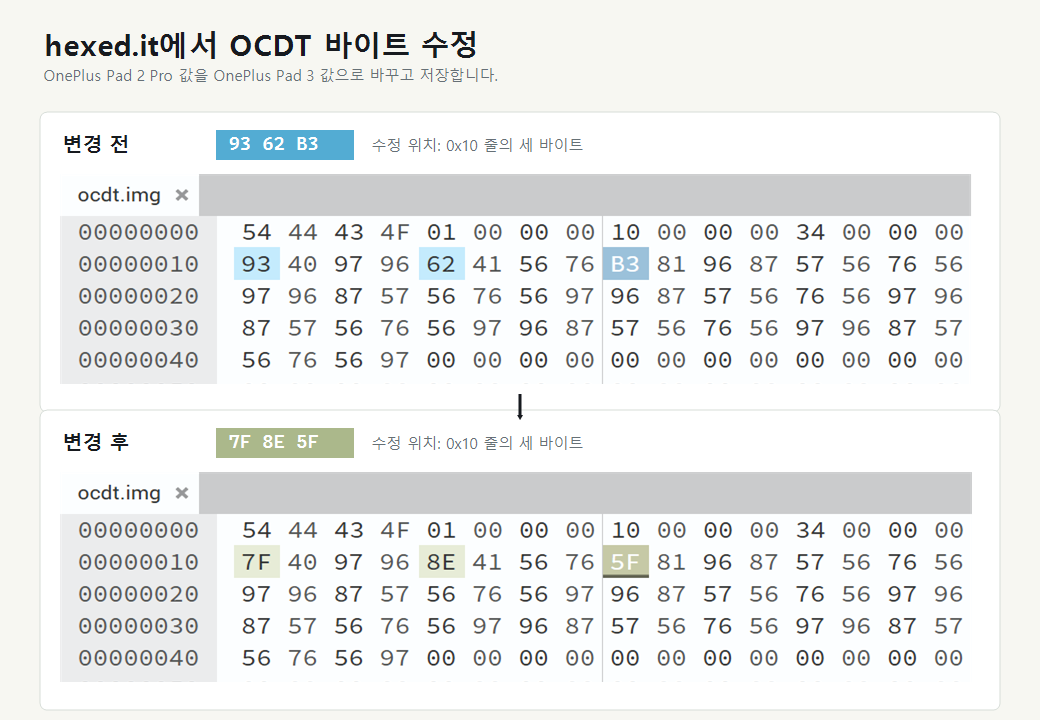
hexed.it works fine as a hex editor. Open the ocdt.img you
backed up and change the bytes shown below. On a OnePlus Pad 2 Pro, 93 62 B3 becomes
7F 8E 5F. The values may differ on an OPPO Pad 4 Pro, but the offset is very likely the same.
93 62 B3
7F 8E 5F
Rename the saved file to ocdt_new.img and keep it in the same folder as the original
ocdt.img. Then copy it to the device and write it to the OCDT partition:
adb push ocdt_new.img /sdcard/
adb shell su -c dd if=/sdcard/ocdt_new.img of=/dev/block/bootdevice/by-name/ocdt
adb shell su -c rebootC:\> adb push ocdt_new.img /sdcard/
ocdt_new.img: 1 file pushed
C:\> adb shell su -c dd if=/sdcard/ocdt_new.img of=/dev/block/bootdevice/by-name/ocdt
256+0 records in
256+0 records out
131072 bytes copied
C:\> adb shell su -c reboot
Seeing records out and the copied byte count means the write command completed.
06 / Check
Check pen pairing after the reboot
When the reboot finishes, check that pen pairing works on the OnePlus Pad 3. If you had been forcing the connection through nRF Connect, you may have to delete the old Bluetooth pairing and pair again.
If the recovery went as intended, the jailbreak is already gone after the reboot, so the KernelSU app can be uninstalled.